Using a 3D Sketch instead of 2D for the SOLIDWORKS Hole Wizard

Article byJames Swackhammerupdated June 2, 2020
Article
We are all used to the standard method of applying SOLIDWORKS Hole Wizard holes. In the Feature tab click on Hole Wizard, select the size, click the Position tab and place the hole in the part. Easy-peasy right?
There are times where we must design based off the tools in the manufacturing facility. What if you’re a small shop and don’t have a long enough drill bit or tap to go all the way through the part? Sometimes we go this route if the hole is long and we worry about tolerance and drilling a slight oval instead of a circle. So, if these scenarios happen we must make a hole on the top and a connecting hole in the bottom.

SOLIDWORKS Hole Wizard
How can we show this in SOLIDWORKS? Well, let’s use the 3D sketch option in Hole Wizard.

Hole position 3D Sketch
For an example I am going to use my Main Bearing Cap. Using the regular Hole Wizard feature, establish our type of holes, and the End Condition – Blind with half the height of the part. Moving to the Position tab, click on 3D Sketch. This now allows us to place holes on every planer face.
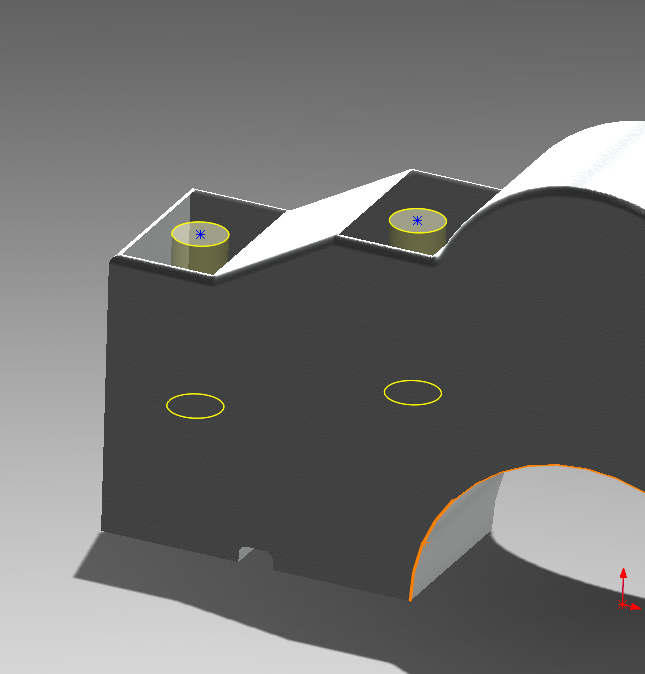
hth华体会全站app3 d草图点补充道
Now I place the two top holes on the flat areas then rotate the part and place the bottom two holes.

Holes on underside
I am going to place the left side holes only and then mirror afterwards. Next, we press the Esc key to stop placing holes and then Ctrl select one top hole and the connecting bottom hole. I then make them line up using the Along Y relation. I do this for both sets.

Adding point relations
To keep with best practices, I want to fully define the holes with dimensions or reference geometry.

Hole point dimensions
I then complete the command and make a drawing of the part.

Drawing of completed part
My drawing is only for the holes. To bring in the hole callout I use the Model items with the Hole Wizard Location and hole callouts marked. You’ll notice it says 8 x which is what we want, meaning 8 in total. You could separate this out if need be to have 4 holes top and 4 bottom with two 3D Hole Wizard commands.
Related Links
获得证书ified SOLIDWORKS Services from Javelin
Javelin Experts can help you to: